
Windows Live メール を起動し、アカウント設定へ
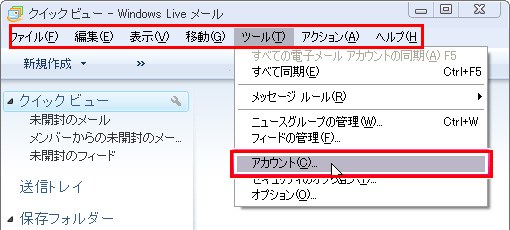
上部メニューより
〔ツール〕→〔アカウント〕をクリック
アカウント設定
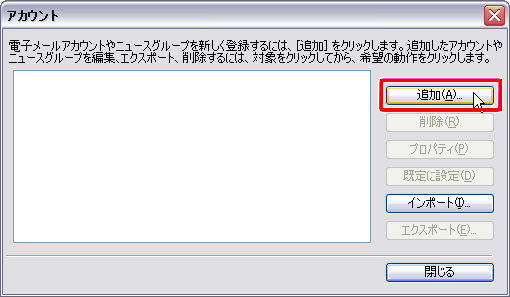
アカウント設定画面が表示されます。
〔追加〕をクリック
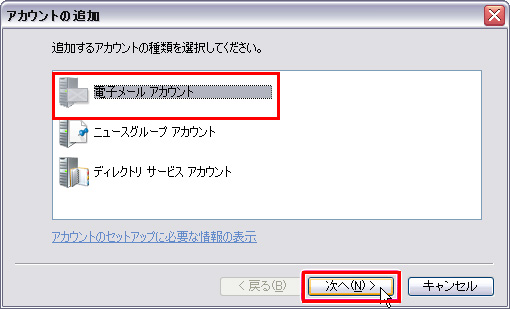
アカウントの追加
〔電子メールアカウント〕を選択し、〔次へ(N)〕をクリック
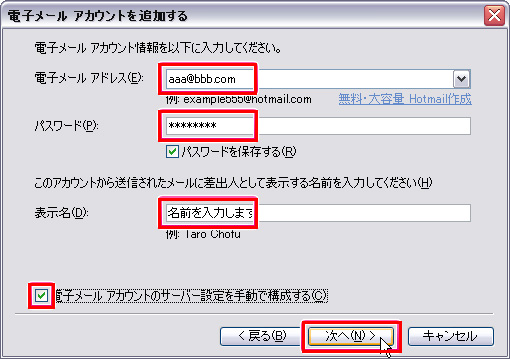
電子メールアカウントを追加
【電子メールアドレス】
【パスワード(大文字小文字を区別)】
【表示名(お客様任意の名前)】を入力。
〔電子メールアカウントのサーバー設定を手動で構成する〕にチェック入れ〔次へ(N)〕をクリック
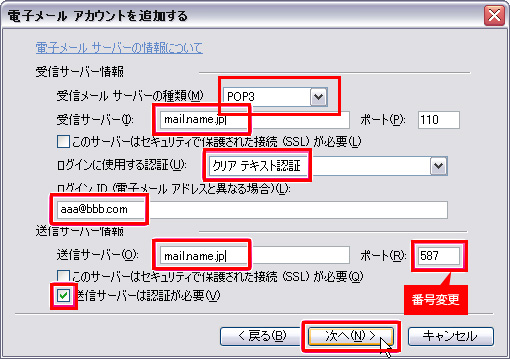
電子メールアカウントを追加
【受信メールサーバーの種類】POP3
【受信サーバー】mail.○○○○
(※○○○○内はお客様ドメイン)
【ログインID】通知アカウント
(通常はメールアドレスと同じです)
【送信サーバー】mail.○○○○
(※○○○○内はお客様ドメイン)
【ポート番号】587に変更
※〔送信メールサーバーは認証が必要〕に必ずチェックを入れ〔次へ(N)〕をクリック
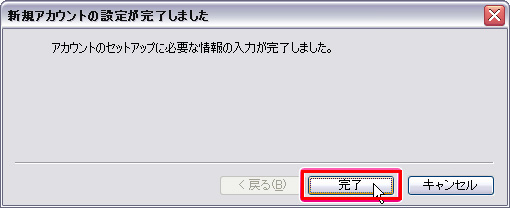
設定完了
〔完了〕をクリックすればWindows Liveメールの設定完了です。